Showing posts with label BW. Show all posts

Monday, August 31, 2015

Motret Model pakai Mamiya RB67..... Gampaang

Sejak beralih ke Medium format analog, saya menemukan apa yang kadang tidak bisa dihasilkan oleh full frame analog atau 35mm. Sekedar flashback, sebelum memakai medium format analog, saya memakai Yashica FX3 Super, Leica M6 dan juga Minolta XGM yang merupakan kamera analog yang memiliki kemampuan untuk menghasilkan gambar yang menakjubkan.....

Fast forward, setelah pindah ke medium format (walaupun masih kadang memakai 35mm), saya melihat apa yang tidak bisa didapatkan di 35mm, yaitu dimensi gambar dan juga dynamic range yang sungguh memikat dari sistem medium format. Saat ini saya memiliki 3 kamera medium format dengan tipe yang berbeda, yaitu Mamiya RB67 dengan format 6x7, Mamiya C330 Professional TLR dengan sistem Twin Lens Reflex dan yang terbaru adalah Hasselblad 2000FC/M dengan ssistem 6x6.

Dua terakhir akan saya ulas kemudian, saat ini saya ingin membagikan pengalaman memotret dengan menggunakan Mamiya RB67.

copyright of andre 2015, use with permission
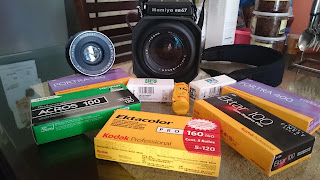
Mamiya RB67 dengan Lensa 50mm f/4 dan lensa 90mm f/3.8

copyright of andre 2015, use with permission
Beberapa film 120mm yang saya pakai

copyright of andre 2015, use with permission
Racun.... :)

copyright of andre 2015, use with permission
Film selesai cuci siap di scan

copyright of andre 2015, use with permission
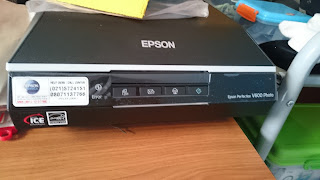
Scanner Epson V600

copyright of andre 2015, use with permission
Shoebox scanner

copyright of andre 2015, use with permission
Plat Akrilik yang juga bisa saya gunakan sebagai scanner


Tentunya selain kamera, anda memerlukan film 120mm baik BW maupun warna, film jenis ini masih banyak koq beredar di pasaran, baik dalam maupun luar negeri dan tidak sulit dicari. Untuk film BW saya melakukan proses develop sendiri, setiap roll memakan waktu kurang lebih 30 menit untuk proses develop atau pencucian, dan setelah kering siap untuk di scan dan di digitalisasi....

Pertanyaannya: Kenapa sih repot2 pake film trus diubah ke digital, langsung aja pakai digital  kan lebih praktis?
Jawaban: Betul sekarang dengan adanya era digital dan didukung dengan jaringan yang kuat dan stabil, maka dengan menggunakan ponsel pintar pun anda sudah bisa menghasilkan gambar yang baik dan layak untuk dibagikan ke teman anda, akan tetapi seperti halnya mobil klasik, maka penggunaan analog bagi orang yang sudah hobby merupakan sebuah tantangan yang sangat mengasikkan, dimana anda tidak bisa tahu apakah hasil jepretan anda jadi atau tidak sampai film tersebut dicuci dan di scan, selain itu memotret dengan analog membuat anda menjadi perhatian terhadap komposisi, exposure, lighting dan juga aperture karena semua dilakukan dengan cara yang manual.

Tetapi mari kita tidak terjebak dengan analog atau digital, anggaplah memotret dengan analog adalah hobby lain dari kebiasaan memotret kita.

Saya lanjutkan dengan proses pemotretan. Karena berat dari RB67 ini cukup membebani leher, maka saya terkadang menggunakan tripod sehingga tidak terlalu melelahkan dalam setiap sesi pemotretan.

Lighting saya lebih menyukai natural light ataupun window light karena memberikan kesan kuat pada gambar, walaupun bisa juga kita menggunakan flash light ataupun studio light karena RB67 sydah memiliki kemampuan synchronisasi dengan lampu studio anda.

copyright of andre 2015, use with permission
Window Light
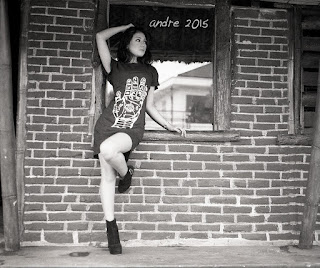
Pada gambar-gambar yang saya tampilkan di tulisan ini semua menggunakan film Ilford HP5 Plus 400 dan menggunakan tripod, untuk detail exif tidak bisa saya tampilkan, karena saya tidak mencatat setiap gambar yg saya ambil :) dan untuk lightmeter saya gunakan aplikasi Lightmeter pada iPhone saya :)

copyright of andre 2015, use with permission
Available light

copyright of andre 2015, use with permission
Available Light
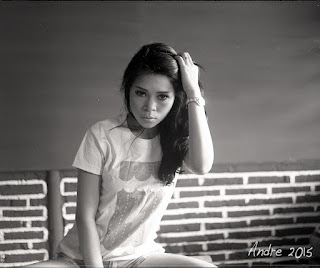
Dari ketiga gambar diatas maka terlihat dengan jelas perbedaan nyata antara digital dan analog serta full frame dengan medium format. Dimensi gambar yang dihasilkan oleh medium format memang berkesan berbeda dengan 35mm, dan umumnya format medium ini digunakan oleh para fotografer studio yang membutuhkan detil dan karakter pada setiap fotonya.

Warna atau BW? Rasanya untuk pilihan penggunaan film bisa tergantung dari kesukaan sang fotografer, semua kamera, film dan prosesing harusnya terlihat bagus dimata fotografernya, barulah dari karya tersebut anda selaku fotografer belajar untuk memuaskan mata para penikmat hasil karya foto anda.

Saya akan berikan beberapa gambar lagi hasil pemotretan di satu tempat dengan model mbak Tyas Mikory. Selamat menikmati dan juga selamat berkarya.....

Salam
copyright of andre 2015, use with permission

copyright of andre 2015, use with permission

copyright of andre 2015, use with permission

Saturday, May 16, 2015

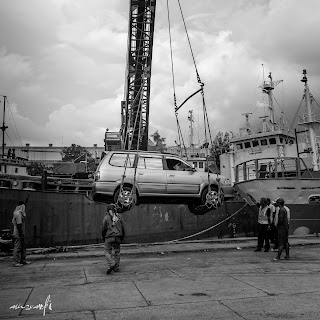
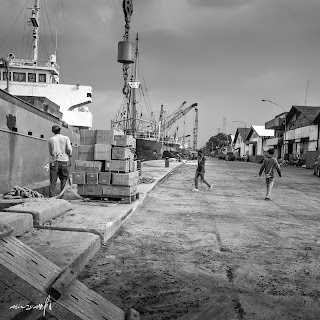
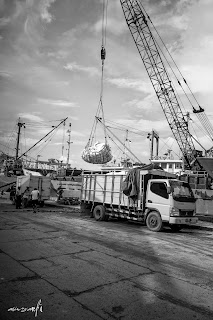
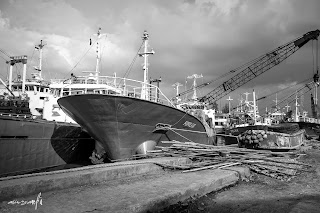
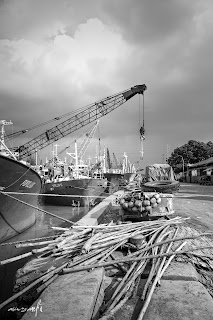
Kalimas Surabaya - The Traditional Sea Port

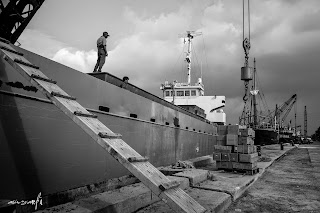
Kalimas traditional seaport is located at the east of Kalimas River, lies about 10 kilometers west of Kenjeran beach. Comprising a two-kilometre stretch of warehouse and wharves along the East ward flank of Tanjung Perak, Kalimas is a living history of Surabaya's maritime heritage where carts and human toil continue to load and unload merchandise into and out of tile holds of brooch-beamed Phinisi Schooners. The best visit in order to see the loading and unloading activities is in the morning or before the sun, climbs too high and schooners set sail. The available facilities are; place parked, lodging and restaurant. It is easy reachable by various public vehicles.

Kalimas is the fraction of Brantas River that has upstream in Mojokerto town, flow into northeast direction and have estuary in Surabaya (Madura Strait). A hypothesis tell Kalimas is river becoming the gateway of Majapahit Kingdom, and in this river have ever happened encounter between Raden Wijaya (the founder of Majapahit) fight against Tar-tar (Mongol) team at 13th century.
Kali Mas is also as the limited line between Sidoarjo regency and Gresik regency. The estuary of Kalimas is traditional port of Surabaya, which have been there since for centuries ago. A number of the bridges getting through Kalimas in Surabaya now specified as culture pledge, refer to it historical value.

Went ther mid April 2015, and have a chance to shot a couple of activities around the area. It surely is a beautiful place to take picture.

Note: Images are copyrighted. Unauthorized use and/or duplication of this material without express and written permission from this blog’s author and/or owner is strictly prohibited. Excerpts and links may be used, provided that full and clear credit is given to me and Photo Passion with appropriate and specific direction to the original content.

Unauthorized use and/or duplication of this material without express and written permission from this blog’s author and/or owner is strictly prohibited

Unauthorized use and/or duplication of this material without express and written permission from this blog’s author and/or owner is strictly prohibited

Unauthorized use and/or duplication of this material without express and written permission from this blog’s author and/or owner is strictly prohibited

Unauthorized use and/or duplication of this material without express and written permission from this blog’s author and/or owner is strictly prohibited

Unauthorized use and/or duplication of this material without express and written permission from this blog’s author and/or owner is strictly prohibited

Unauthorized use and/or duplication of this material without express and written permission from this blog’s author and/or owner is strictly prohibited

Unauthorized use and/or duplication of this material without express and written permission from this blog’s author and/or owner is strictly prohibited

Unauthorized use and/or duplication of this material without express and written permission from this blog’s author and/or owner is strictly prohibited

Unauthorized use and/or duplication of this material without express and written permission from this blog’s author and/or owner is strictly prohibited

Unauthorized use and/or duplication of this material without express and written permission from this blog’s author and/or owner is strictly prohibited

Friday, May 15, 2015

A Makeshift Negatif Film Scanner

Since I've been shooting with analog, I've got a little problem to scan the image from negative to digital, especially for the 120mm film, as the scanner price is quite high, and I didn't want to invest my money on that thing....

So finally I've got a link from my friend on how to make a makeshift scanner from a shoebox

Basically you make a square hole on top of the box with the exact measurement of your negative film (my case I'm using 120mm)

scanner
The shoe box scanner
And also we need to make a holster for the film to slide using a piece of HVS paper.
After that make a peeping hole that big enough for your digital camera or mobile phone

Using a lamp inside the box, simply slide the film to the holster and then take the picture of the slide.
The box with film in and the lamp is on

Export that to photoshop and invert the image
Image exported to photoshop

Voila!! the image start to appear.
image after being inverted

Edit as you like and here you go, a scanner for under $2 and within 10 minutes of work..
good luck

Final Result:
a little touch using Ps or Lightroom


Friday, September 23, 2011

Up, close and macro with my Leica M8.. a new journey begins

Well... it's been 2 fascinating days playing around with my M8... been browsing a lot of sources about M8, best tips and tricks to deal with tricky rangefinder, all the pros and cons about this little beauty....

So I think I should grab a couple of pics of my M8. This time I'm using my Canon 7D + 100mm F/2.8 L Lens

The boop dragon... nice shutter caps

nice color


the logo that storm the world....

at the moment I'm happy with the Nokton's performance

looks solid


nice tiny lens
And a shot with my M8 today
sharp bw

Thursday, September 22, 2011

Experiencing Leica M8 on Hand

Year after years... my goal was to be able to have a Leica in my hand. So after a long and painful saving process, I managed my self a used Leica M8 which still cost me around $3,000 for the body, and for the lens I chose Voigtlander Nokton 35mm F/1.4 the cheapest lens for M Series (around $600) while dreaming that someday I might get my self a Cron or even a Lux... *fingers cross.....

So there will be no un-boxing photos here as this is not a new thing....
To tell the truth, this is the first time I've ever shot with a range finder, so I'm still getting used to it....

After fiddling around with the menu, settings, charging the battery, I can get few shots. But too bad the CD that comes with the package can not be installed to my Mac, probably because I've got the latest iMac which is 64 bit. But still OK, I can download the picture using Lightroom.

So here are the first couple shots that I can take with my new used M8.. :-)

Very good color saturation

Amazing bokeh

a bit misfocus here :-p but still a good color saturation + nice bokeh

sharp....

nice DOF

soft....

self potrait

Sunday, September 11, 2011

The mango flower in colour

Hanging around my garden and suddenly realized that my two years old mango tree has started to grow some flowers in it... this means in a couple months time I can start to enjoy mango fruit from my own garden.. yipeee....

Took my 50D and 100mm F/2.8L and snap couple of pics....