Showing posts with label black and white. Show all posts

Monday, May 18, 2015

Motret Model? Gampang..... - The Idiots guide on Model photoshoot

Salam,

Sengaja saya membuat artikel kecil mengenai sedikit tips untuk memotret model. Karena sekarang sudah sangat tren memotret model hampir di setiap kota. Setiap ada event photo maupun acara off air lain, maka memotret model adalah salah satu dari bagian acara tersebut.

Saya akan share pengalaman saya selama saya ikut acara-acara tersebut dan semoga bisa bermanfaat bagi rekan-rekan yang baru terjun di dunia fotografi seperti saya ini....

Artikel ini akan saya buat secara sederhana dengan model Q and A atau tanya jawab

Q: Enaknya pakai kamera apa?
A: Pakai kamera apapun bisa, bahkan smartphone model terbaru sudah sangat mumpuni untuk mengambil gambar
Sony A7s - Nikkor 55mm f/1.2

Fuji Xt1 - 56mm
 Q: DLSR atau Mirrorless?
A: Ini pertanyaan yang sering saya jumpai, secara prinsip dan kualitas semua sama, hanya mirrorless memang lebih ringan dan tidak ada bagian kamera yang bergerak tidak seperti SLR, dan kualitas mirrorles pun sudah bisa menyemai entry level DSLR
Sony A7s - Nikkor 55mm

Pentax 645z
Q: Pake Flash atau tidak?
A: Flash bersifat fill in ke gambar, saat mengambil gambar model, perhatikan lingkungan sekitar, apakah memang perlu memakai tambahan cahaya dari flash atau tidak, dan juga hindari penggunaan pop-up flash kamera karena akan membuat obyek anda over exposure dan background anda menjadi gelap.
Fuji Xt1 - 56mm

Fuji X100T
Q: Lensa apa? Wide? Tele? Normal?
A: Lensa ibarat mata manusia, dimana kita terbiasa melihat, itulah lensa yang cocok buat kita. Beberapa rekan saya lebih senang menggunakan tele seperti 70-200 saat memotrat model, hal ini dikarenakan fotografer dapat menjaga jarak yang cukup jauh dengan model, sehingga model lebih bebas dalam berekspresi, dan juga untuk menghasilkan DOF atau bokeh yang bagus.
Beberapa fotografer lebih memilih lensa normal atau 50mm atau bahkan juga ada yang senang lensa wide, untk memberi kesan luas pada hasil jepretannya. PErlu disadari saat melakukan hunting bersama, masuklah pada grup lensa yang tepat, misalnya anda memakai lensa tele/zoon maka jangan ikut pada pemakai lensa fix/wide, anda akan menemui kesulitan untuk mengambil gambar

Leica M9 - 50mm Summicron
Leica Monochrom - 90mm Summicron
Q: Warna atau Hitam putih ya?
A: Bebas..... hasil jepretan anda akan dinikmati pertama kali oleh anda, untuk kemudian mungkin anda akan share melalui media sosial kepada rekan-rekan anda. Untuk melakukan editing tonal warna maupun lainnya anda bisa menggunakan aplikas yang banyak tersedia di pasaran, baik untuk desktop maupun untuk mobile phone anda.

Leica Monochrom - 90mm Summicron
Q: Apa enak moto rame-rame?
A: Tergantung pada rasio antara model dan fotografer, pernah sekali saya ikut suatu acara hunting bersama, dan ternyata peserta hunting berjumlah 300an orang, sedangkan model yang ada hanya 10 orang, alhasil rasio model dan fg adalah 1:30, ini akan sangat sulit bagi kita untuk melakukan atau mendapat foto dengan hasil bagus, karena 30 orang akan terus bersuara untuk memanggil model supaya melihat ke kamera, juga akan banyak orang yang mungkin menggunakan pop up flash sehingga foto anda yang sudah di komposisi secara baik menjadi over exposure karena anda memencet shutter bersamaan dengan rekan sebelah anda yang memakai flash.
Bocooor.... istilah yang sering diteriakkan para FG untuk mengusir FG lain yang ada di dekat model :)


Leica Monochrom - 90mm Summicron

Leica Monochrom - 35mm summicron
 Q: Pose yang enak seperti apa?
A: Partikan model anda dalam keadaan santai, tidak tegang dan memahami instruksi pose anda, pada event-event tertentu, anda tidak diperbolehkan untuk menyentuh model akan tetapi anda boleh mendekati model dan menyampaikan instruksi pose anda. Sebelum maju kedepan pastikan anda melihat dulu ke teman-teman yang sedang membidik agar jangan sampai mereka terganggu karena anda maju ke depan. Beberapa hal yang perlu diperhatikan adalah untuk pose tangan jangan sampai jari terpotong frame, pucuk kepala juga sebaiknya terlihat

Leica Monochrom - 50mm Summicron

Leica M9 - 28mm Summicron
Secara berkala akan saya update artikel ini jika ada tips-tips baru yang bisa ditambahkan pada artikel.

Selamat mencoba.... :)

Saturday, May 16, 2015

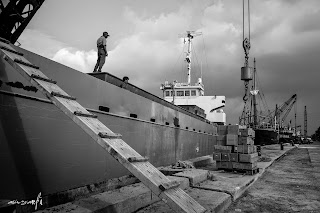
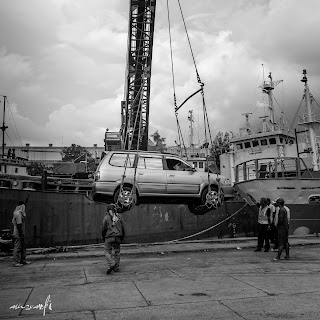
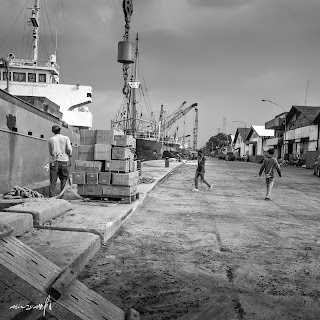
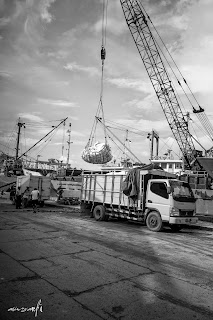
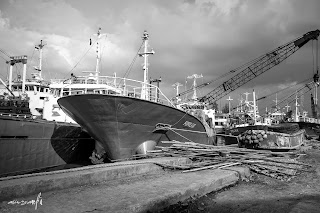
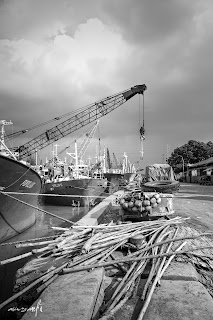
Kalimas Surabaya - The Traditional Sea Port

Kalimas traditional seaport is located at the east of Kalimas River, lies about 10 kilometers west of Kenjeran beach. Comprising a two-kilometre stretch of warehouse and wharves along the East ward flank of Tanjung Perak, Kalimas is a living history of Surabaya's maritime heritage where carts and human toil continue to load and unload merchandise into and out of tile holds of brooch-beamed Phinisi Schooners. The best visit in order to see the loading and unloading activities is in the morning or before the sun, climbs too high and schooners set sail. The available facilities are; place parked, lodging and restaurant. It is easy reachable by various public vehicles.

Kalimas is the fraction of Brantas River that has upstream in Mojokerto town, flow into northeast direction and have estuary in Surabaya (Madura Strait). A hypothesis tell Kalimas is river becoming the gateway of Majapahit Kingdom, and in this river have ever happened encounter between Raden Wijaya (the founder of Majapahit) fight against Tar-tar (Mongol) team at 13th century.
Kali Mas is also as the limited line between Sidoarjo regency and Gresik regency. The estuary of Kalimas is traditional port of Surabaya, which have been there since for centuries ago. A number of the bridges getting through Kalimas in Surabaya now specified as culture pledge, refer to it historical value.

Went ther mid April 2015, and have a chance to shot a couple of activities around the area. It surely is a beautiful place to take picture.

Note: Images are copyrighted. Unauthorized use and/or duplication of this material without express and written permission from this blog’s author and/or owner is strictly prohibited. Excerpts and links may be used, provided that full and clear credit is given to me and Photo Passion with appropriate and specific direction to the original content.

Unauthorized use and/or duplication of this material without express and written permission from this blog’s author and/or owner is strictly prohibited

Unauthorized use and/or duplication of this material without express and written permission from this blog’s author and/or owner is strictly prohibited

Unauthorized use and/or duplication of this material without express and written permission from this blog’s author and/or owner is strictly prohibited

Unauthorized use and/or duplication of this material without express and written permission from this blog’s author and/or owner is strictly prohibited

Unauthorized use and/or duplication of this material without express and written permission from this blog’s author and/or owner is strictly prohibited

Unauthorized use and/or duplication of this material without express and written permission from this blog’s author and/or owner is strictly prohibited

Unauthorized use and/or duplication of this material without express and written permission from this blog’s author and/or owner is strictly prohibited

Unauthorized use and/or duplication of this material without express and written permission from this blog’s author and/or owner is strictly prohibited

Unauthorized use and/or duplication of this material without express and written permission from this blog’s author and/or owner is strictly prohibited

Unauthorized use and/or duplication of this material without express and written permission from this blog’s author and/or owner is strictly prohibited

Friday, May 15, 2015

A Makeshift Negatif Film Scanner

Since I've been shooting with analog, I've got a little problem to scan the image from negative to digital, especially for the 120mm film, as the scanner price is quite high, and I didn't want to invest my money on that thing....

So finally I've got a link from my friend on how to make a makeshift scanner from a shoebox

Basically you make a square hole on top of the box with the exact measurement of your negative film (my case I'm using 120mm)

scanner
The shoe box scanner
And also we need to make a holster for the film to slide using a piece of HVS paper.
After that make a peeping hole that big enough for your digital camera or mobile phone

Using a lamp inside the box, simply slide the film to the holster and then take the picture of the slide.
The box with film in and the lamp is on

Export that to photoshop and invert the image
Image exported to photoshop

Voila!! the image start to appear.
image after being inverted

Edit as you like and here you go, a scanner for under $2 and within 10 minutes of work..
good luck

Final Result:
a little touch using Ps or Lightroom


Thursday, September 22, 2011

Experiencing Leica M8 on Hand

Year after years... my goal was to be able to have a Leica in my hand. So after a long and painful saving process, I managed my self a used Leica M8 which still cost me around $3,000 for the body, and for the lens I chose Voigtlander Nokton 35mm F/1.4 the cheapest lens for M Series (around $600) while dreaming that someday I might get my self a Cron or even a Lux... *fingers cross.....

So there will be no un-boxing photos here as this is not a new thing....
To tell the truth, this is the first time I've ever shot with a range finder, so I'm still getting used to it....

After fiddling around with the menu, settings, charging the battery, I can get few shots. But too bad the CD that comes with the package can not be installed to my Mac, probably because I've got the latest iMac which is 64 bit. But still OK, I can download the picture using Lightroom.

So here are the first couple shots that I can take with my new used M8.. :-)

Very good color saturation

Amazing bokeh

a bit misfocus here :-p but still a good color saturation + nice bokeh

sharp....

nice DOF

soft....

self potrait

Sunday, September 11, 2011

The mango flower in colour

Hanging around my garden and suddenly realized that my two years old mango tree has started to grow some flowers in it... this means in a couple months time I can start to enjoy mango fruit from my own garden.. yipeee....

Took my 50D and 100mm F/2.8L and snap couple of pics....


Sunday, August 21, 2011

The World of Black and White

Beberapa foto jepretan hari ini in BW diolah memakai Adobe Lightoom

Gear Used: Canon 50D + Carl Zeiss Planar 50mm F/1.4